This smoke machine (It will be inside the paybox when i finish the paybox)
output_720p.mp4 (13.4 MB)
Video of it running, one of the cars is a bit fucky, but ill sort it out eventually 😂
Moira Rose is DEAD!
This smoke machine (It will be inside the paybox when i finish the paybox)
output_720p.mp4 (13.4 MB)
Video of it running, one of the cars is a bit fucky, but ill sort it out eventually 😂
Much better clearance, also, dusty af 😭
I put the walkways on the waltzer today, they were stable and im happy with the fit, but, im hot gluing them in place, the reason being, im moving the waltzer around a lot, and altho stable, they will fall off and it will annoy me.
However, there is an issue that i thought might rear its head, but was hoping otherwise.
The platforms now touch the top of the walkways, but only in a specific place.

I ballsed up the gate heights, bur it should be a fairly easy fix, Im just gonna reduce the height of the tiny and small gates.
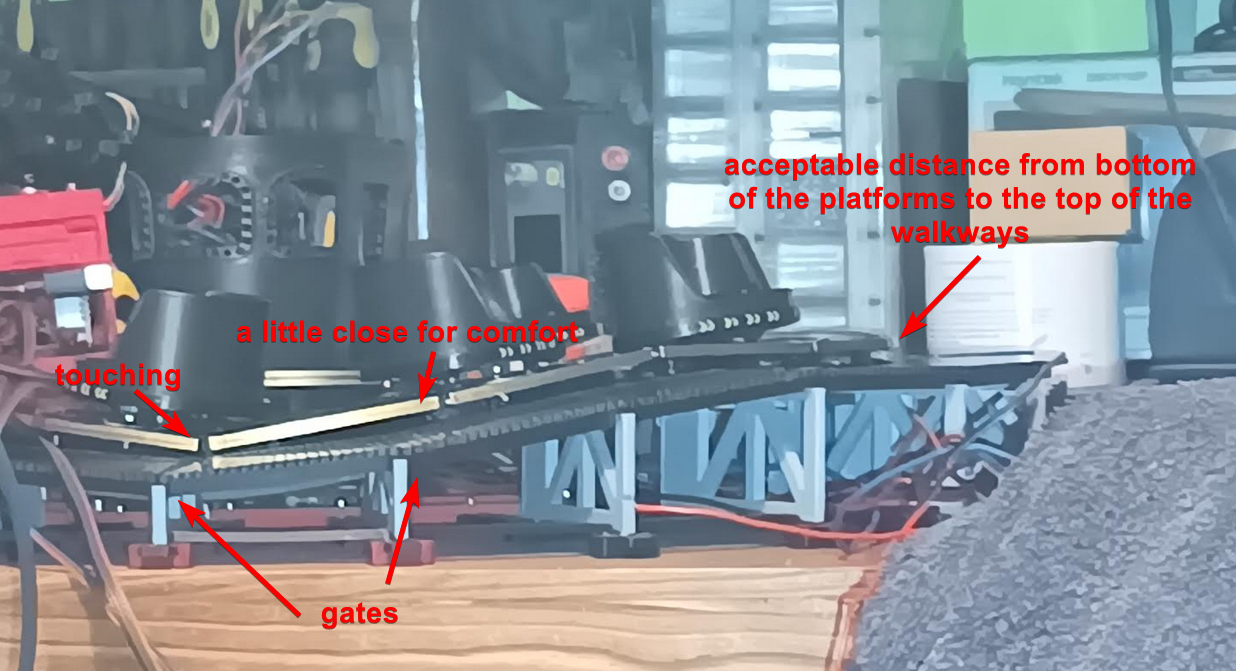
Excuse the crappy picture, but it should make some sense.
Ill reduce the height of the tiny gate by 2-3mm, and the small gate by maybe 1mm.
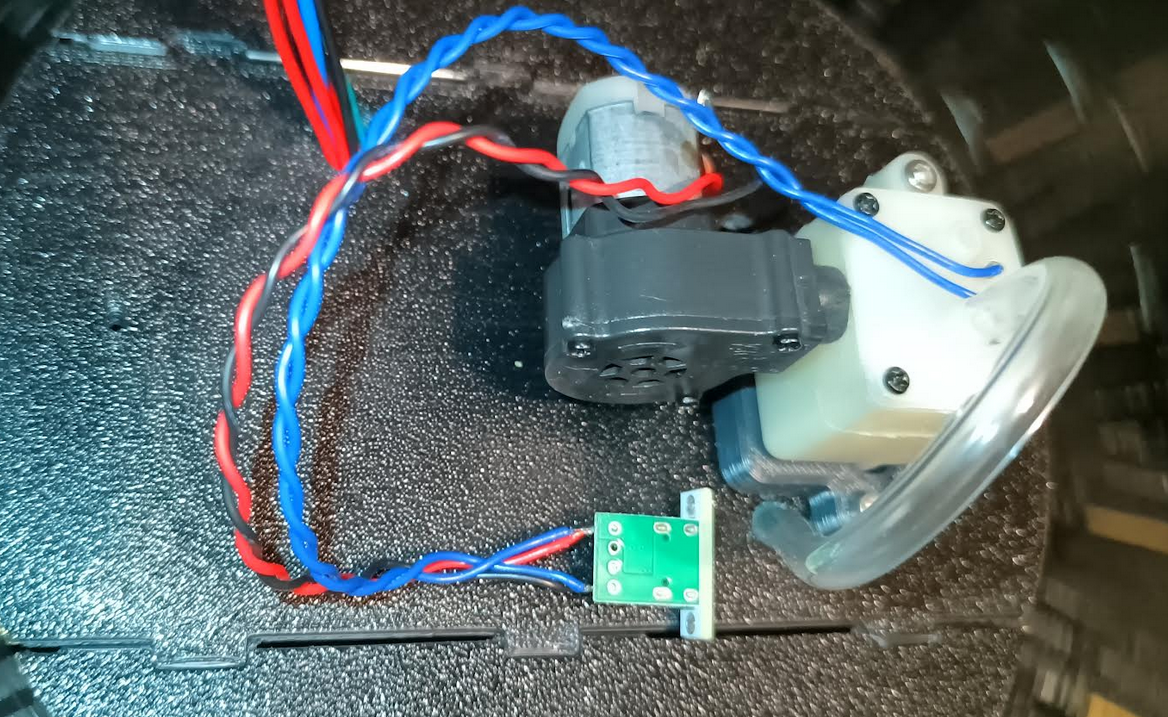
Oh, i forgot to mention, i have a little RC Tank smoke generator for the ride. Ive mounted it in the paybox, and it has 2 tubes for the smoke with goes under the paybox platform, this should make a pretty nice effect when the ride is fully built.
If i remember, ill post a picture someday, cause it looks kinda cool lmao
I dont remember if i posted about this, but ive been working on the waltzer cars.
Some of the cars werent spinning very well, so i have once again replaced the pivot pin with a different design, not printed in TPU. Its what i should have done from the beginning, but i wanted to rely on as little external hardware as possible.
What ive done now, is this.
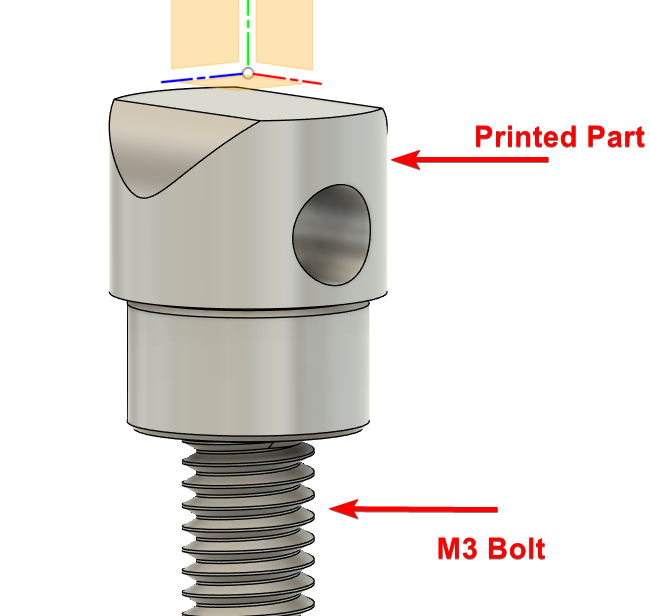
You glue the m3 bolt to the printed part, and that makes up the pivot pin. It allows fits really well, all the cars spin as expected, and it also allows me to use a nut on the end of the bolt to adjust the hight the front of the car sits at.
The cars all now spin how they should yay
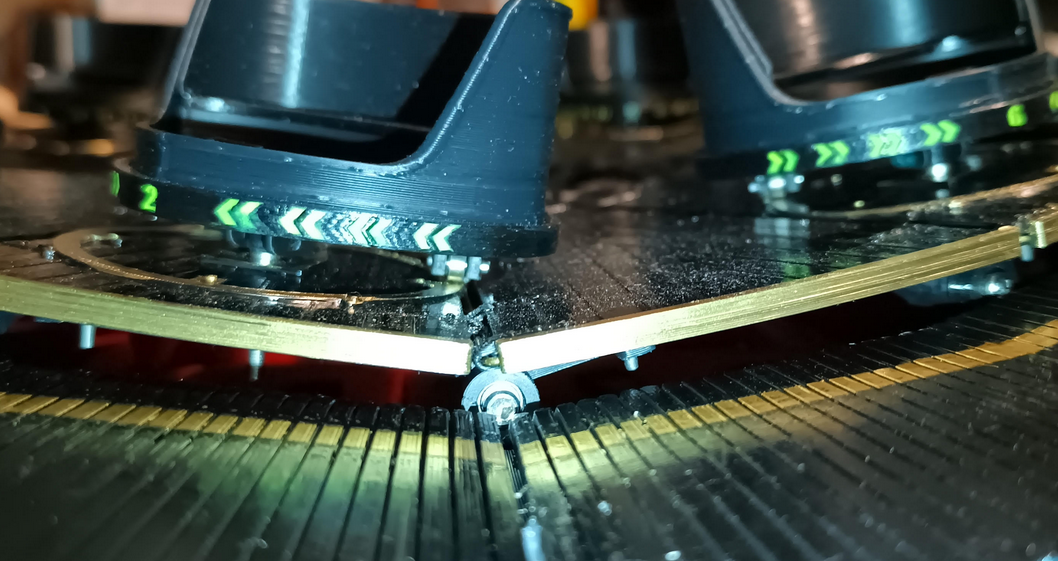
I modified the car to add numbers and arrows to the lower part of the car.

I have filled the little arrows and number with some fluorescent acrylic paint, which when hit with a UV light, fluoresces.
I might be jumping the gun, and im pretty sure i mentioned getting brass rods, but it seems the flexibility of the brass rods that initially put me off using them, actually seems to help keep them in place. So i dont need to modify the platforms to add a notch for the hingepin to sit in.
Also, I purchased some liquid latex mask originally for its intended purpose, which is to mask off areas you are going to paint. But ive found a new use for it. A little drop is enough to keep the track pins in place, and is easily removable since its designed to be removed.
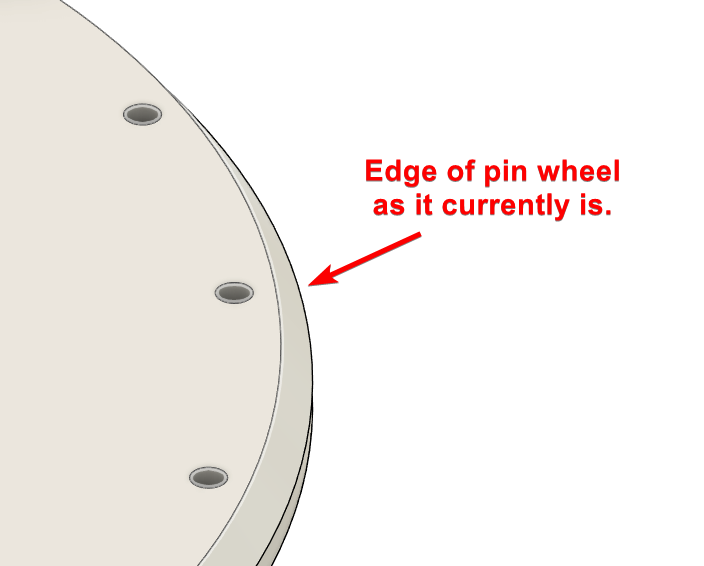
I dont think the hinge bars or the platforms are the issue with my platforms not bottoming out. Im pretty sure i said i had it solved, yeah, that wasnt actually the case. Im pretty sure the hingebars are fouling on the pinwheel. Ive reduced the edge part of the pinwheel so there is enough material to hold the pins in place, but nothing too excess, that should give the platforms more wiggle room.
Im probably not explaining that well. Here is some pics

Hello, me again. Disregard the previous post. Dont use hotglue. It just jammed the hinge mech and prevented the platforms from rotating 😂😭
The waltzer is now using the tongue bars, and its way better, so im glad i swapped them.
I do have one "issue", The hingebars work their way loose gradually over time, as a result, if you run the machine for more than say 10 minutes, the hinge bars will stick out by an inch or so.
Ive added a slot to the moving platform, so when the hingebars are put in place, they can be rotated into the slot to prevent them moving forward or backward when the ride moves.
I dont reall want to print a whole new set of platforms for a single change, so im using some hotglue on the inside radius of the platforms (hidden from view) hinge.🤷♂️
Im not happy with the pins im using for the hingebar to pin wheel connection. Because they are plastic heads on a metal pin, the bonding isn't very good and as a result, the head pops off the pin with even a small amount of force.
I tried looking for all metal pins, but they only seem to exist with ~2mm heads, which isnt big enough.
So, im trying something new, I just ordered some tongue bars, the ones used with piercings, they are all metal and have a 5mm head which should work well.

I am printing the hingebars again 😭
When i was putting the wheels on, i originally had a little hubcab type thing that sat in the middle of the wheel (the bearing), It was glued in place with a pin, it worked well, except, i had replaced the hingebars so much in the last few days that the glue was building up, and as a result, the wheels were sticking out too far and slightly clipping the gates.
So i have removed the pin and glue from the equation, and now the hub will be printed as apart of the hingebar. This should keep the wheels where they meant to be, on the track.
Finally figured out why the platforms were overlapping randomly.
Turns out it was the new pinhead fasteners I switched to for connecting the hinge bars to the pin wheel. My original design just had a slot that went over a pin with a cap, but I wanted something closer to the real thing. So I went with 4mm pinheads and push fit fasteners instead.
Turns out they need some wiggle room side-to-side, not just rotation.
Anyway, the platforms now sit nice on the track. Ran the machine for about half an hour earlier to listen for anything out of place, but it was surprisingly quiet.
There is one issue though, after running the ride, some of the hinge pins work their way loose. They don't fully come out, but Ive seen some stick out by a few cm, which isnt really acceptable tbh. Gonna have to find a temporary way to secure them that isnt too visually distracting and can be easily removed.
I new those detachable tow hitch things were gonna cause an issue somewhere 😭
I think ive worked out the issue with the waltzer platforms.
Each platform has 2 hinges, they each connect to a wheel bar. When i printed the original platforms, there was a point in the track where the wheels lifted off the track. To fix that, i increased the size of the holes for the hinge pin, giving it a little more movement. I thought it would allow the platforms to move laterally enough to keep all the wheels on the track. What it appears to do, is make it super easy for the platforms to seize up / jam. Which then causes the motors to freak out and the bevel gear to be destroyed 😭
Im just biting the bullet and printing out platforms with slightly different hole sizes, its gonna take forever, but one of them will have to work eventually... right? 🤷♂️
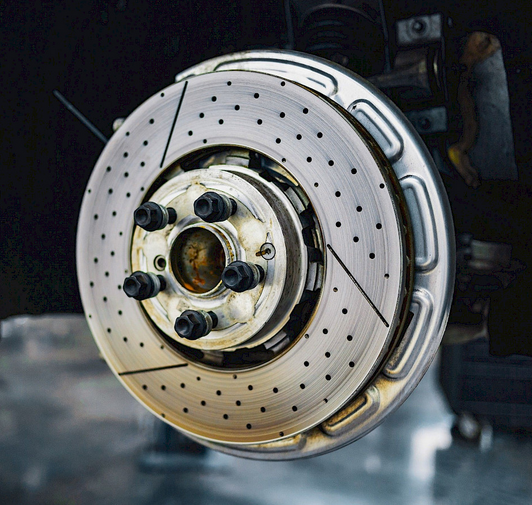
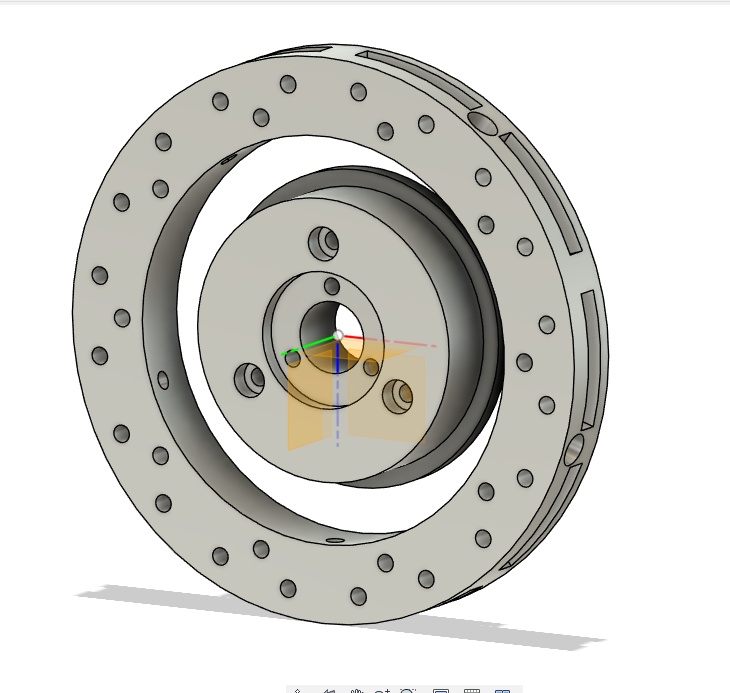
Im designing something in fusion, its a spin the wheel thing... and i realise, it just looks like a cars breaks or whatever... I think i re-invented the wheel 😭
I tried the waltzer the other day, for some reason, even tho i havent changed the size of the platforms, for some reason, they are too big? The yellow and blue platforms where a little too small, and now, those same platforms reprinted, are too big... It makes no sense.
Anyway, i felt deflated after that, so its on the shelf again for an unknown length of time. I was doing quite well on it too, i had the canopy done, the walkways, and the paybox / motor connection, which i dont think i posted on here tbh. 😭
Someone should make a mod for filament dryers that is an "MMS", Manual Material Selector.
It should be a switch you flip on the filament dryer, when flipped, it cuts the current filament and starts feeding the new filament, no purging, no layer changes or what not, infact, the printer doesn't even need to know this modification exists.
Is it any use? Nope, but its pretty cool.🤷♂️
Im still awake. I just poked the walkway to see if the pva has completly disolved yet, which it hasnt, but its infintly better than a few hours ago.
I wonder if warm water would do it faster...
I wonder if PLA can go in the dishwasher without warping 😂
On the walkways, there is a line, usually yellow, used as a "hey dont cross this when the ride is moving" line. I dont trust myself to paint a straight line, so im doing an experiment.
I tried to use masking tape to mask off an area and paint it, which worked, but the paint seeped up lines left on the 3d print.
So im trying this other way i just concocted in my head.
Ive placed some tape where i want the line to be, painted over the tape and the surrounding area with PVA glue, then i removed the tape, leaving the area i want painted, exposed. I then painted that area and left it to dry for a few hours.
The good thing about PVA glue is, its water soluble, which means, if my theory is correct, i can wash the glue off, and leave just the line of paint.
I just put it in a bowl of water, and the pva is dissolving.
I gave it a bit of a helping hand with a brush, but i was a little too aggressive and some of the paint came off. The fact the paint only dried for a few hours probably didnt help😂 im pretty sure it says on the bottle it can take 24 hours to fully dry😭
Im gonna leave it in the bowl overnight and see how it is tomorrow. I noticed earlier that the glue in the gaps of the print wasnt dissolving, so if its gone by the time i wake up, ill give the whole experiment another shot, but actually let the paint fully dry for a day this time.
Im REALLY tempted to get an ultrasonic cleaner, not just for the glue, but for cleaning PCBs and what not too...
I dunno wtf is going on. I reprinted the platforms, reverting back to the original design, except enlarging the hole, and i put them all in place and they are too big... which makes no sense, ive measured the old and the new and they are identical except the hole size, so how are they taking more room... 😭